I have added this post to assist those installers that are looking to integrate SolarEdge single phase inverters into a Victron installation. This is an enhancement to the instructions already given here on the Victron website but have included higher definition diagrams and some additional instructions/steps that have been left out (or are unclear) of the guide and which I have found out due to the experiences we have had on various sites.
For the purpose of this post I have only concentrated on the single-phase installation and have left out the SolarEdge inverters with a LCD screen.
1. Introduction
In 2019 SolarEdge has introduced a new feature that allows AC-coupling with alternative power sources (or non-grid power sources) such as the Victron Energy Inverter/chargers range, facilitating continuous solar production during outages or in off-grid scenarios.
When a solar inverter is operating concurrently with a non-grid source, it may be subjected to voltage and frequency fluctuations that exceed trip setpoints, which are preconfigured according to regional grid connection requirements. To support simultaneous operation while powered by a non-grid energy source, SolarEdge “Alternative Power Source mode” (APS) supports extended frequency & voltage operating range and frequency-power & voltage-power “off-grid” dedicated droops.
With this feature you can now build custom size AC Coupled Hybrid single-phase and three-phase systems with the capability to enable zero feed-in to the grid when in On-Grid mode and frequency shifting power control in Off-Grid situations.
For more information: https://www.solaredge.com/sites/default/files/se-inverter-support-of-voltage-sources.pdf
The AC coupled system sizing guideline, Factor 1.0 rule, from Victron Energy for AC coupled system must be adhered to.
Note
This APS feature is only available for 3phase and 1phase HDwave inverters.
2. How to configure APS mode
Requirements:
- For SetApp (screenless) inverters: Firmware 4.8.24 or higher (US models currently lack Frequency Control, and are therefore not compatible)
- For LCD inverters: Firmware 3.25xx or higher
- Dry-contact for sensing the grid supply. (Victron’s auxiliary Dry-Out can also be used)
- SolarEdge grid meter (required for Zero feedback)
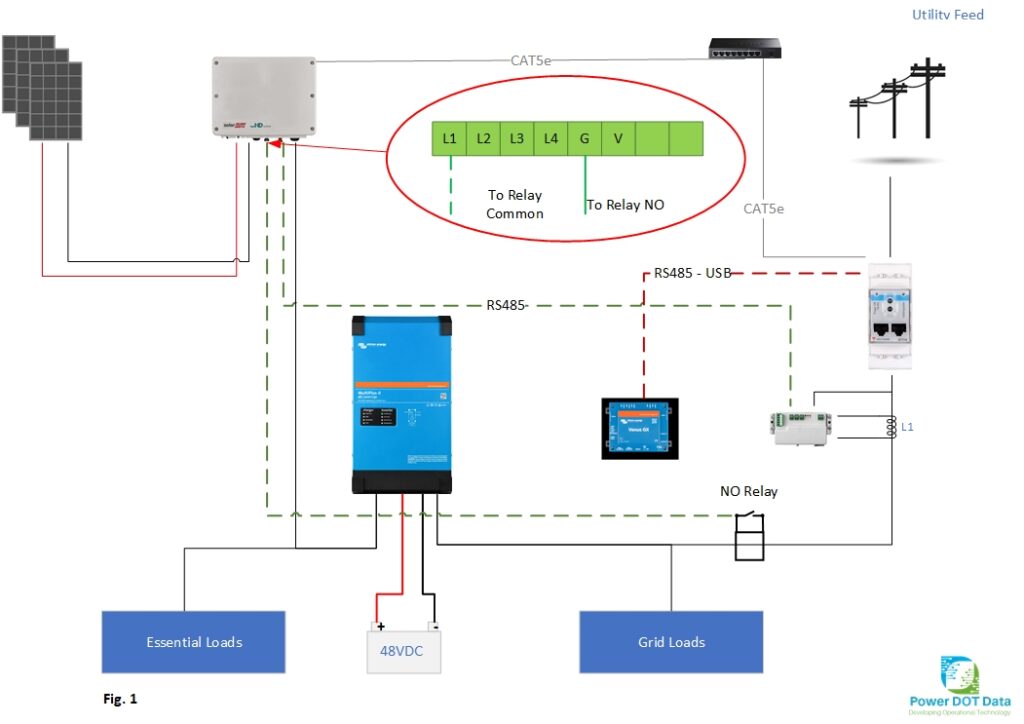
Configuration example 1: Use of external relay and dry contact, Single-phase configuration, see figure 1
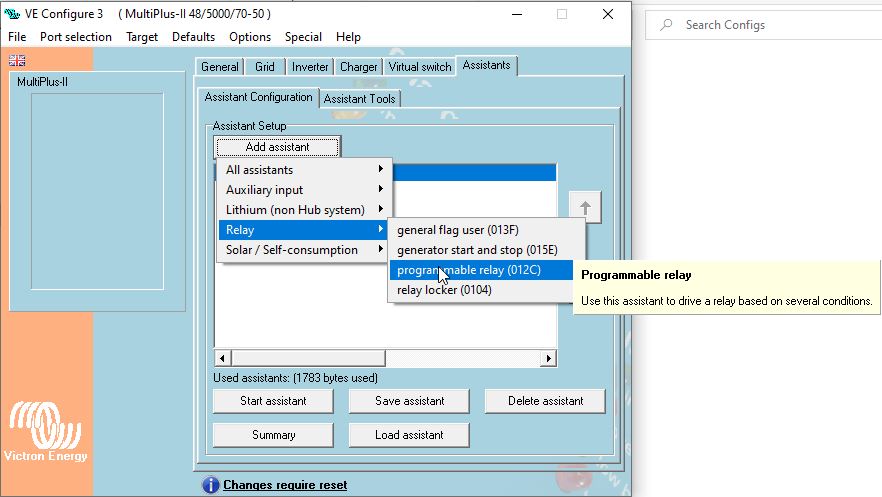
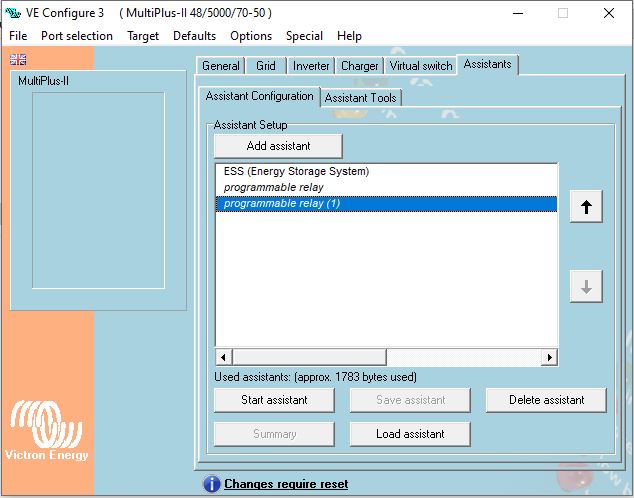
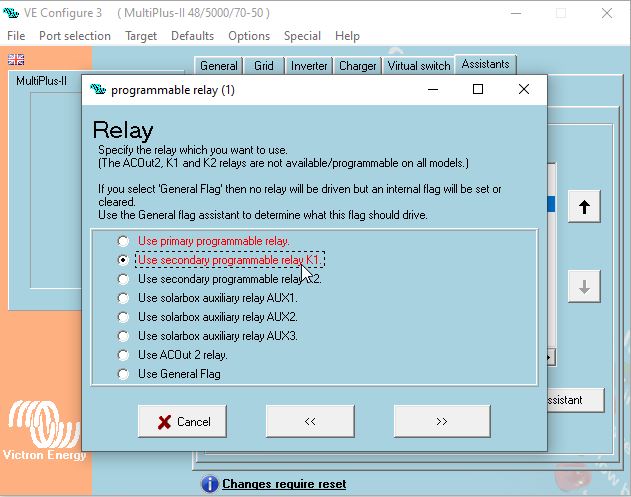
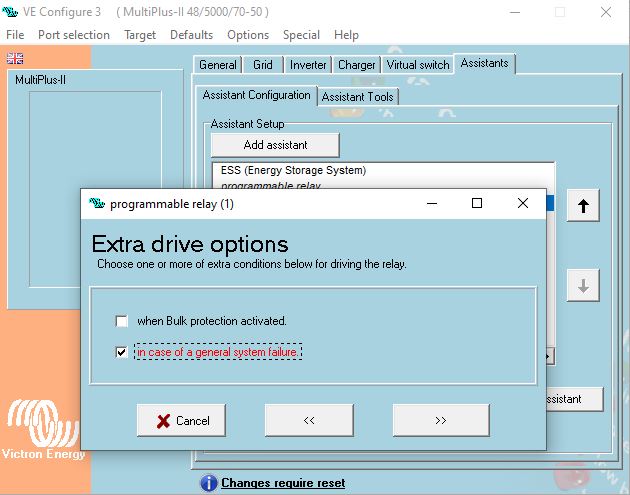
Configuration example 2 using Internal programmable relay K1
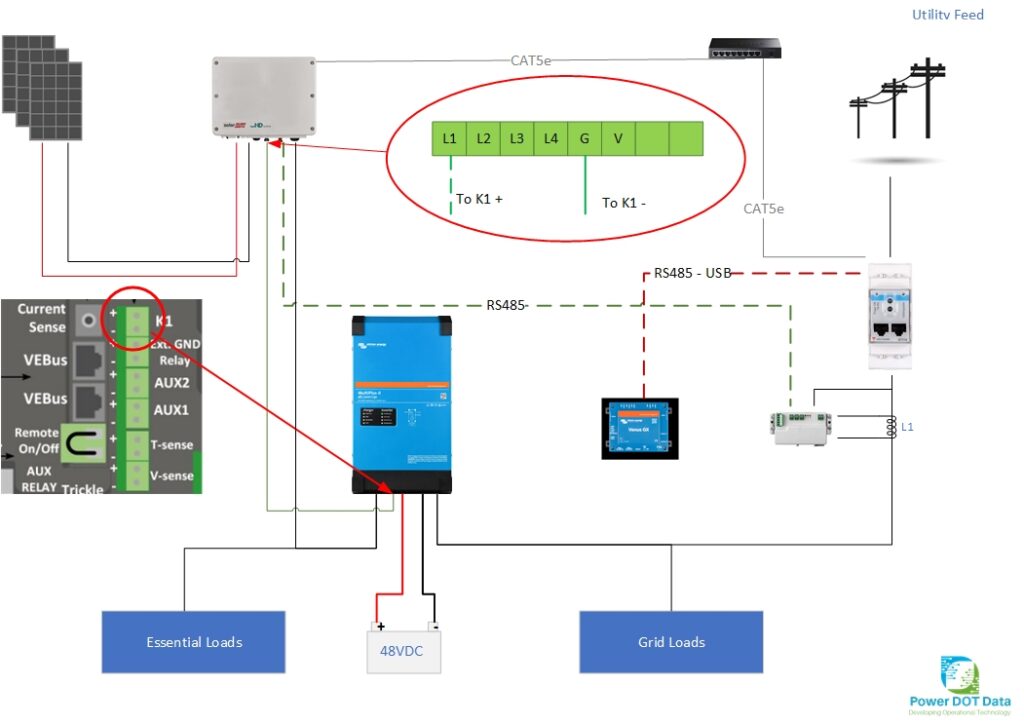
This is where things became a little unclear on the initial walkthrough......
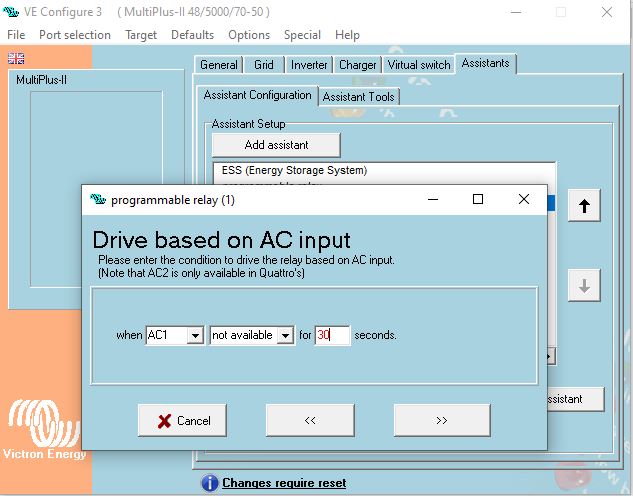
You will need to add a Programmable Relay Assistant TWICE.
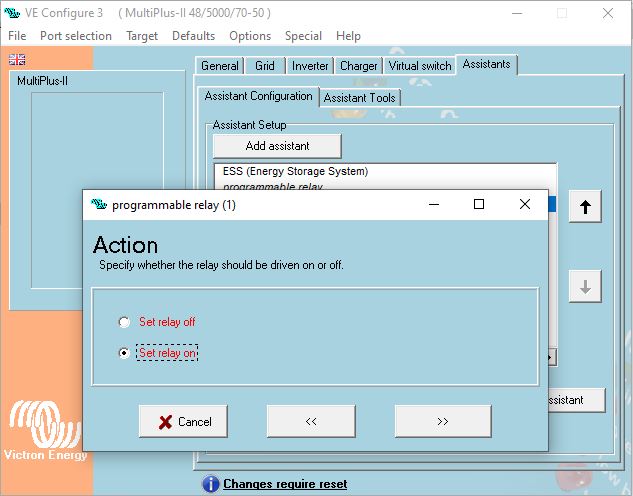
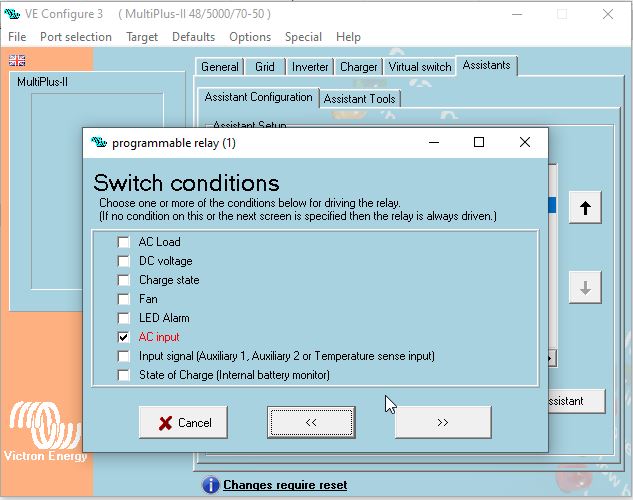
Set the first relay so that it activates (Set relay on) when the power (AC1) fails (not available) for the amount of time that you decide on.
Set the second relay to activate (Set relay off) when the power (AC1) returns (available) for the amount of time that you decide.
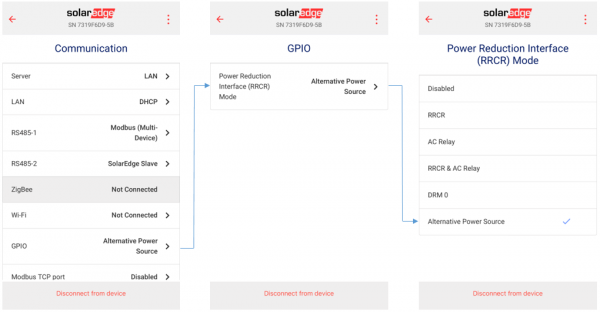
2. Alternative Power Source mode
Alternative Power Source mode should be configured on the master inverter. Once configured, the master inverter automatically sets all detected slave inverters to Alternative Power Source mode.
To Configure Alternative Power Source mode:
- Commissioning → Communication → GPIO → Power Reduction Interface (RRCR) Mode → Alternative Power Source.
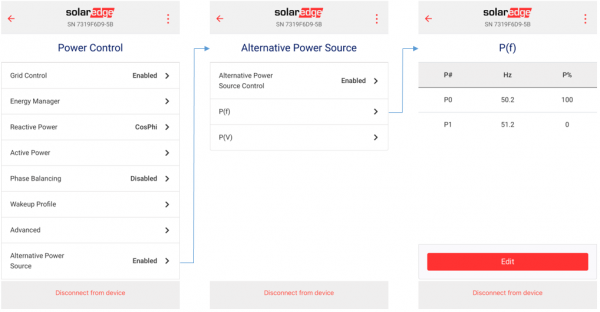
3. How to configure Frequency Shifting
Important note: Please ensure the SolarEdge inverter and your VE.Bus Config is set up for the same frequency bandwidth.
1. Configure P(f) for APS
- Power Control → Alternative Power Source → P(f)
- Edit P0: 50.2Hz, 100% Power
- and P1: 51.2Hz, 0% Power
***IMPORTANT**
Based on the country that you are installing in, the Frequency Shifting with APS mode Feature may not be enabled on your SolarEdge inverter, you will need to phone support in order to have this activated.
4. Set ESS assistance
The same bandwidth needs to be configured on VE.Bus Config for Victron
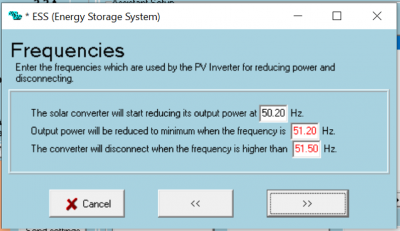
Start ESS assistance and set:
- The solar converter will start reducing its output power at 50.2Hz
- Output power will be reduced to a minimum when the frequency is 51.2Hz
- The converter will disconnect when the frequency is higher than 51.5Hz
5. How to configure Sunspec to allow inverter monitoring via Victron GX device
- Ensure that the GX Device and the SolarEdge system are both on the same LAN or WiFi network.
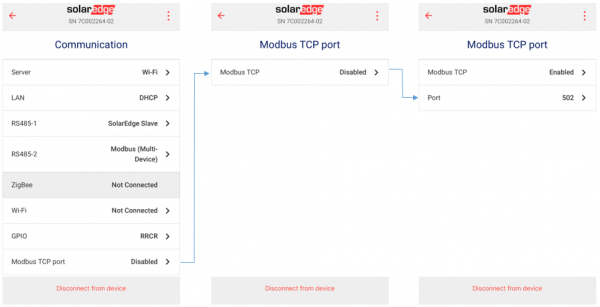
- Enable ModbusTCP
- Communication → Modbus TCP port → Modbus TCP → Edit port to 502.
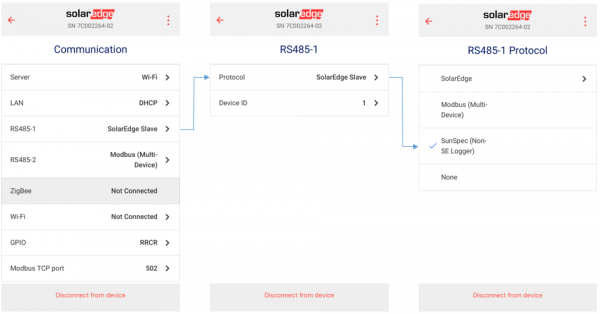
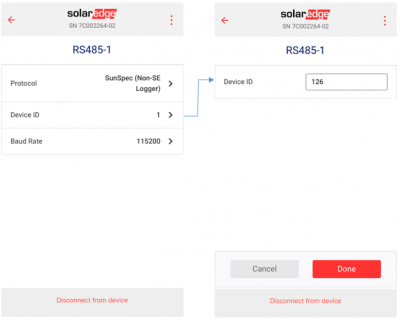
3. Enable SunSpec
- Communication → RS481 → Protocol → SunSpec (Non-SE Logger) → Device ID → Edit to 126
Once you are done with the SunSpec setup you can re-configure RS485-1 for your SolarEdge Grid meter. The SolarEdge meter is still required for a zero export setup. The SunSpec setting will remain in the memory of the SolarEdge.
Note: It also advised editing the SolarEdge inverter’s IP address to a static IP by disabling DHCP edit the desired IP address for your SolarEdge inverter and the search for the IP address on your GX Device (Settings -> PV Inverters -> Scan). The SolarEdge inverter will appear on you GX devices screen.